Text on Fire with Glossy reflection Photoshop Tutorial- Part 1
Burning fire effects with glossy reflection is a great special effect, which can be achieved without much skill in Photoshop.
In this tutorial, I will show you how to achieve a Text on fire effect with glossy reflection in Photoshop easily. This tutorial will be in two parts.
Though I have done my best to optimize all images, yet this page may take time to load because of the number of images used. Hope you will bear with me.
In the first part, we will learn how to make the Fire Effect inPhotoshop and In the second part, we will learn how to make the Glossy reflection effect.
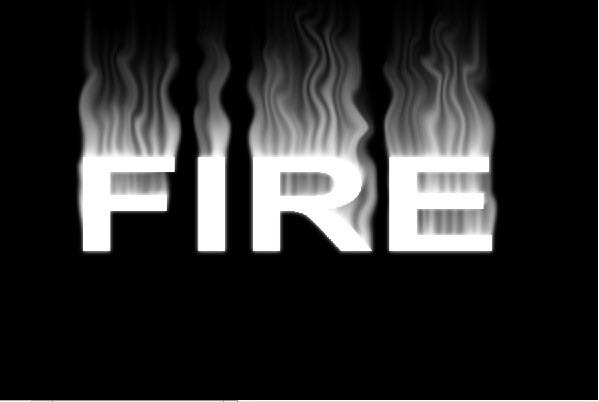
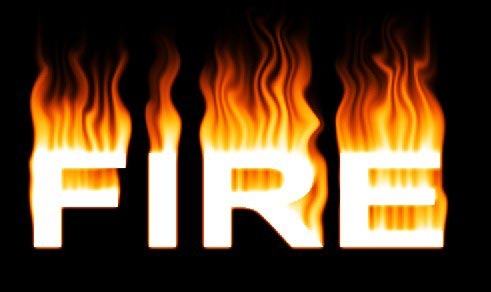
At the end of this first part, you will learn how to make this.
So let’s get started. PART –1
Text on Fire with glossy reflection
NOTE: It’s going to be a lengthy post, be patient at the end you will be grateful to yourself:
I am using Photoshop CS3, but any version will do.
STEP: 1: Open a new Document in Photoshop size 800px by 600px at 72 resolution. Fill your document with black color by going to Edit >> Fill>> Black.
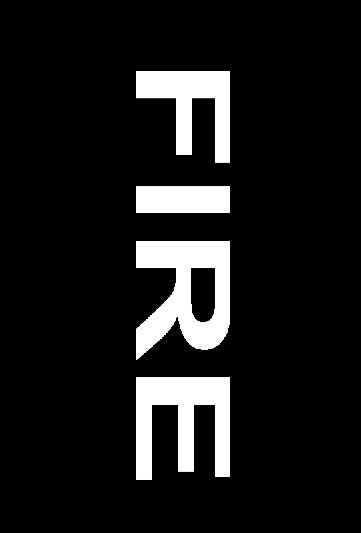
STEP: 2: With the Type tool, type some word in your document. For this tutorial, I typed “FIRE” using Arial Bold font and size at 250 points. color White.
STEP 3: In the Layer Pallet (Layer pallet is on the right side of Photoshop window) right click on the Text layer and choose “Rasterize type” this is necessary to make the text into pixels and we can apply layer effects.
Now use the “Move” tool and re position the Text in such a way that the text is centered horizontally and is slightly below the center line.
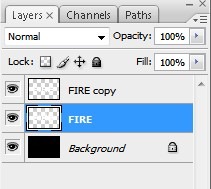
STEP 4: Now Duplicate this Text layer. Right-click on the Text Layer and from the menu choose Duplicate Layer you will now have two layers of the Text.
We will work on the Main Text” Fire” layer only to apply all the effects. So make sure you select the layer “FIRE” as shown is highlighted with blue color. The duplicated layer is on top as “Fire copy” leave it for now.
STEP 5: To get the rising flame effect we will use the Photoshop“WIND” effect. But this filter works only from right to left or left to the right direction.
Since we need the fire effect go vertically upwards, we will have to turn the canvas, to do that go to >> Image menu >>> Rotate canvas>> 90 CW. once you do that all your layers will rotate 90 degrees clockwise wise as shown below.
STEP 6: Make sure that the middle layer is still selected as shown above. Now go to Filter >> Stylize >> Wind . Here select under “Method” wind and direction “From the Left” than click OK, you will see some effect, but that won’t do.
We need to maximize the wind effect more to get a realistic effect, to do that just press the Ctrl button and tap the “F” key four times.
This will apply the Wind filter effect four times more. You may apply this effect more than four times, the effect will depend on the size of the document, if you are satisfied click OK.
Now rotate the image again, To do that go to IMAGE >> rotate canvas >> this time select 90 CCW (counter clock wise). this will rotate your image and now your Image should look like this. as in Image: 1 below.
Image 1: Before Blur Effect
Image 2 : After Blur Effect.
STEP 7: As you can see the wind effect has created very good streaks, but are sharp, so we need to blur it a little bit, to be more realistic.
To do that go to Filter >> Blur >> Gaussian Blur >> Put 2 under “Radius” (adjust the radius according to your liking) but it should not be too blurred either. Your Image now should look like in Image 2 above.
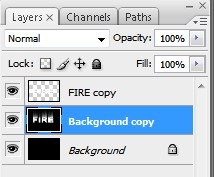
STEP 8: In this step, we need to give the Flame layer a background, this is necessary for the next effect to work. As we already have a black background made earlier, right-click on it and from the menu click Duplicate layer.
Now select the middle Text layer again than go to LAYER Menu and from the drop-down scroll down and select “Merge down” this will merge the Text and the duplicated background layer.
This wont change the look of your image, in fact you wont see anything, but you will see the change in the layer pallet, as shown below. STEP 9:In this step we will give that typical wavy Fire look. So go to Filter >> Liquify . Here set the Brush Size to 80, density to 10 and pressure to 90.
Now with this tool which look like a rounded brush, click on the white streaks and move your brush in such a way to get a sort of “S” pattern waves.
Do that in all the text, just imagine how a Fire would rise up in a wavy pattern, (don’t over do either).
Try to give some wavy pattern on the sides of the letters “F” , “R” and “E”. This step will require a little practice, but not hard. Once satisfied, click on OK.
Now your Image should look like this.
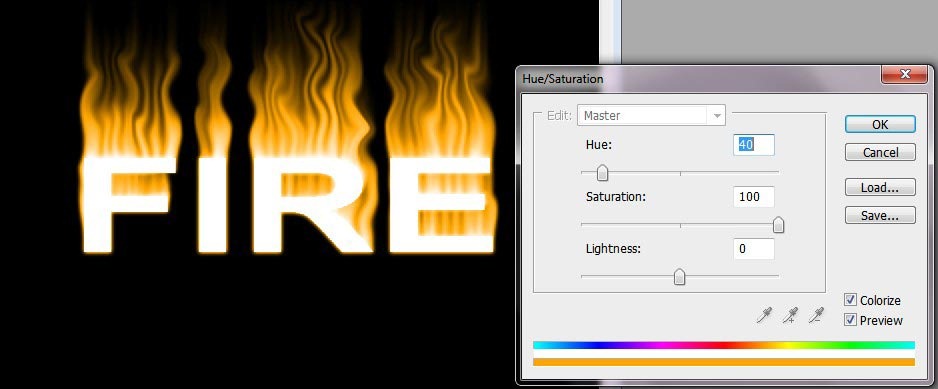
STEP 10: We are almost done for this first part. Now its time to color the Image to give that Fire color.
To do that go to Image>> Adjustments >> Hue/Saturation, Here Select “Colorize” and set Hue to 40 and Saturation to 100.
Now your Image should look like this.
STEP 11: The color of the fire is still not alright, we need to improve the color to be realistic.
Make a Duplicate copy of the Fire Layer (don’t get confused I am talking about the Middle layer we are working on).
Just right click on the layer and from the menu click “Duplicate Layer” .
Select the duplicated layer and Now again go to Image >> Adjustments >> Hue/saturation, this time don’t check the “Colorize” option and set the Hue to –15 (minus 15) to give the flame a nice yellowish red color, set the blending option of the duplicated layer to “Overlay”.
Your Image now will look like this.
Step 12: The Flame effect looks pretty good but the Letters are blurry, edges are not sharp.Need to give some more effect.
Till now we have been working on the middle layer only. We need to apply some color effects to the top white text layer “Fire copy” layer.
Select that layer to make it active. To apply effects to this layer we need to LOCK its transparency, except for the text all around is transparent, to lock the transparency just click on the transparent Icon at the top of the layer pallet.
This will Lock the transparent areas(protect) and we can apply the blending options on the Text itself.
Now to apply some gradient overlay effect from Yellow to brown, so to change these colors change the foreground color to # f9e400 and the background color to # a36a06 ( you may change this according to your choice).
Now select the Gradient tool from the Photoshop side toolbar and swipe a gradient from top to bottom just across the letters only, since the transparency is locked the effect will be applied only on the Text.
Now to apply some blending options effect to the text layer. Go to Layer Menu >> Blending options and apply the Drop shadow layer style and Inner glow effects as shown below.
Click OK … Your Burning Text Effect now Looks pretty realistic. If you are not satisfied you can tweak all the parameters to your Liking. If you have followed this tutorial exactly your finished Image should look like this .
Did you like this tutorial? Could you follow it? Do share with us, if you need help I will be glad to answer. You may like to subscribe to my FEEDS below for updates.
Hello! I am Ben Jamir, Founder, and Author of this blog Tipsnfreeware. I blog about computer tips & tricks, share tested free Software’s, Networking, WordPress tips, SEO tips. If you like my post /Tips then please like and share it with your friends.
We use cookies on our website to give you the most relevant experience by remembering your preferences and repeat visits. By clicking “Accept”, you consent to the use of ALL the cookies.
This website uses cookies to improve your experience while you navigate through the website. Out of these cookies, the cookies that are categorized as necessary are stored on your browser as they are as essential for the working of basic functionalities of the website. We also use third-party cookies that help us analyze and understand how you use this website. These cookies will be stored in your browser only with your consent. You also have the option to opt-out of these cookies. But opting out of some of these cookies may have an effect on your browsing experience.
Necessary cookies are absolutely essential for the website to function properly. This category only includes cookies that ensures basic functionalities and security features of the website. These cookies do not store any personal information.