One of my Favorite Photoshop Effect “ Broken Glass effect”. I hope you will enjoy reading this Tutorial. I am Using Photoshop CS3, but any version should work.
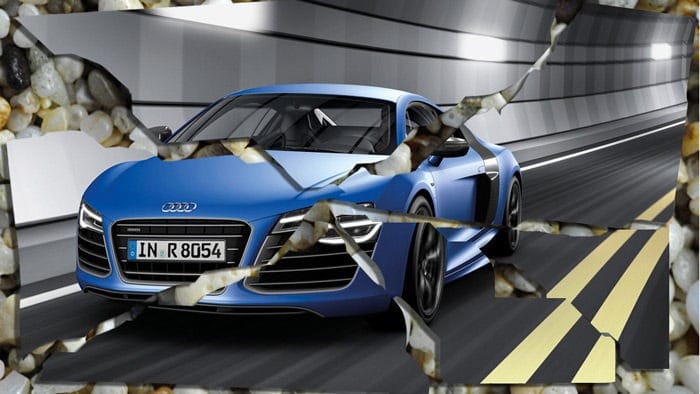
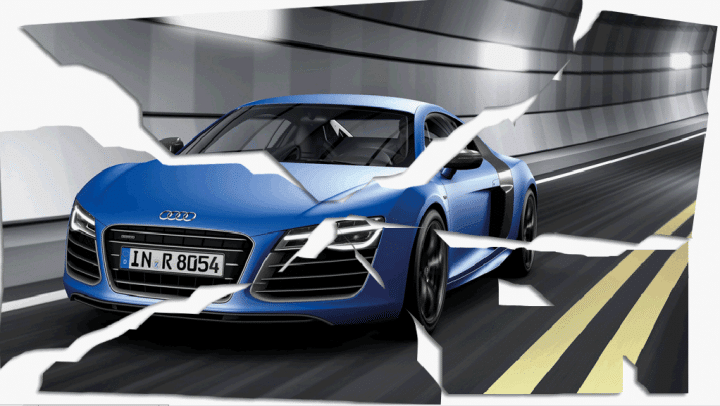
Just follow this tutorial step by step to get this Broken Glass effect. At the end of this tutorial you will be able to achieve an effect like this “Broken glass effect”
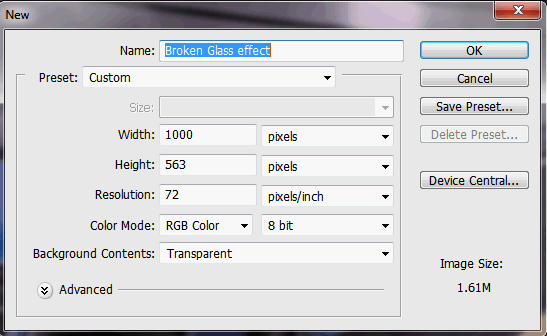
Step 1: Open a new document with transparent background in Photoshop. The size of the document preferably be the same as the image you will use for the effect. Since my Image is of 1000 x 563 , my new document size is also of the same size.
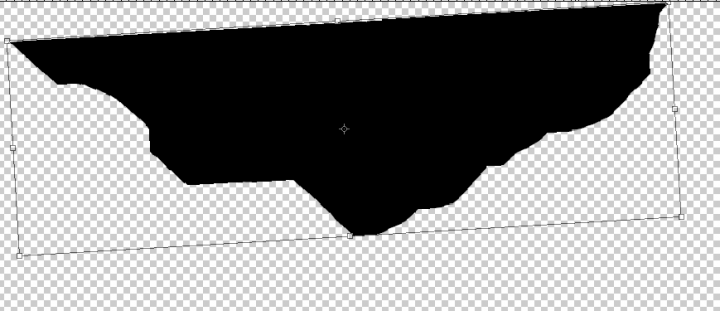
Step 2: With the magnetic lasso tool make a random selection that should look something like this.
Than create a new layer above it and fill it with black color #000000.
Step 3: Now transform this shape a little bit with the transform tool. by pressing Ctrl+T or Edit – free transform
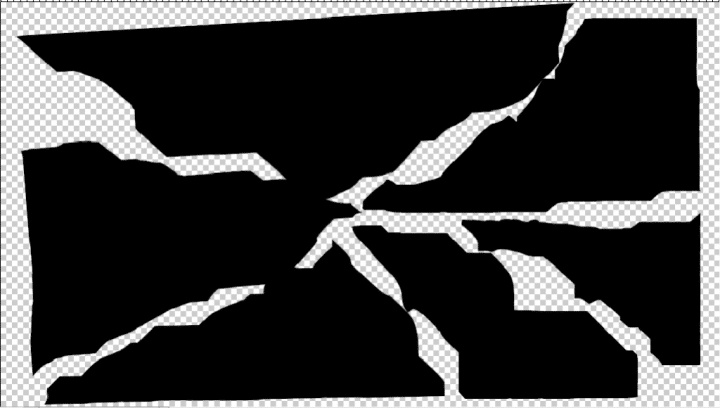
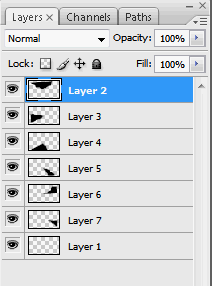
Step 4: Create another new layer and use the Magnetic lasso tool make a shape by the side of the first shape that you made earlier and fill it with black color #000000. Repeat this several times to make different type of shapes that should looks like this on your document.
You Layer Pallet should now look like this. I have here six different shapes on its own layer.
Step 5: Now find the Image that you want to use for the Broken glass Effect. I have used this image,(you can use this image if you want to) and load it on Photoshop.
Now tap on the “V” on your keyboard or select this move tool and drag this image on to your working document window.
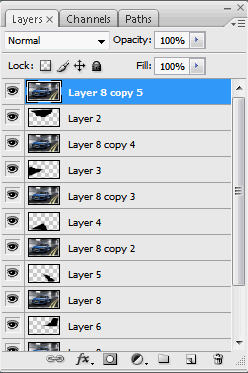
Step 6: Duplicate this layer as many times as you have the shape layer and position the duplicated image layer just above the shape layers on the layer pallet window, this you can achieve by selecting the image and dragging it with the left mouse button pressed and release the button once its in place.
Your Layer pallet now should look like this.
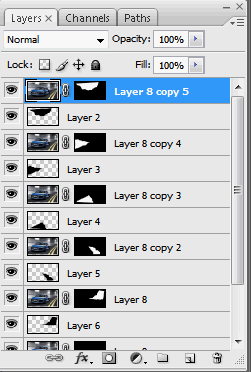
Step 7: Now click on the first Image Layer to select it, as shown on the image on the left, than press the “Ctrl” button on the key board and click on the shape layer just below the image layer this will select the shape, just make sure that the image layer remains selected (denoted by the blue color) than click on the “Add layer mask” button at the bottom of the layer pallet menu, this will add a layer mask along side the image. Do this for every Image layer.
Your Layer’s Pallet will look like this as shown on this Image. A mask layer with every Image. Now hide all the shape layer’s by clicking on the “eye” of the layer. We won’t them now.
You Image Now should look like this.
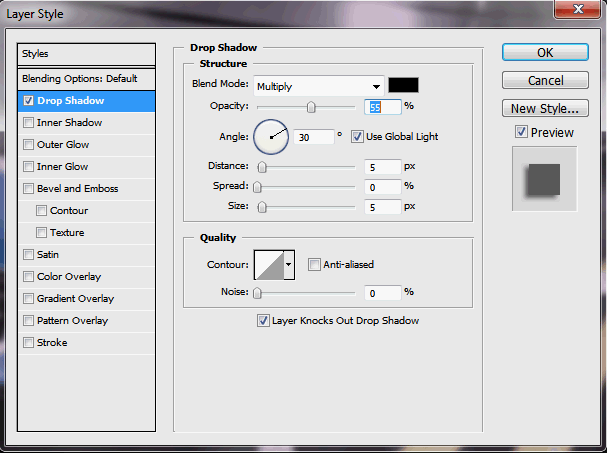
Step 8: Now Apply Drop shadow layer style to each Image Layer. This you can do by going to Layer- Layer styles – blending options – Drop shadow. You may use the default settings for Drop shadow or tweak it according to your own liking, I kept the default settings, works fine.
Your Image should look like this now, after applying the drop shadow layer style.
Just to highlight the drop shadow effect I had to add a new white layer at the bottom.
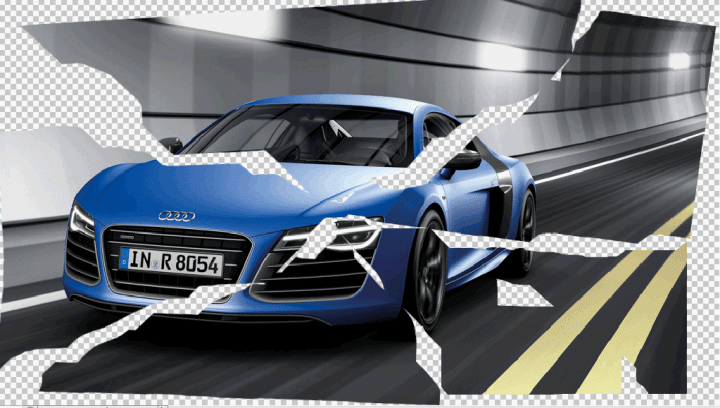
Step 9: Without a fitting background for this Broken Glass effect, the Image is not complete. You can use any Image, I used a stock photo of Pebbles as a background to enhance the Broken glass effect.
Final Image:
That’s it ! Did my best to explain with as many illustrations.I hope you could follow this tutorial. Any doubt or comments are welcome.
You may also like to read “ Photoshop tutorial on Burning Fire effect with glossy reflection”
Hello! I am Ben Jamir, Founder, and Author of this blog Tipsnfreeware. I blog about computer tips & tricks, share tested free Software’s, Networking, WordPress tips, SEO tips. If you like my post /Tips then please like and share it with your friends.
1 thought on “Photoshop Tutorial: Stunning Broken Glass Effect”
Thats the complete tutorial, Thanks for commenting. More tutorial on the way. Just revisit.
Comments are closed.
We use cookies on our website to give you the most relevant experience by remembering your preferences and repeat visits. By clicking “Accept”, you consent to the use of ALL the cookies.
This website uses cookies to improve your experience while you navigate through the website. Out of these cookies, the cookies that are categorized as necessary are stored on your browser as they are as essential for the working of basic functionalities of the website. We also use third-party cookies that help us analyze and understand how you use this website. These cookies will be stored in your browser only with your consent. You also have the option to opt-out of these cookies. But opting out of some of these cookies may have an effect on your browsing experience.
Necessary cookies are absolutely essential for the website to function properly. This category only includes cookies that ensures basic functionalities and security features of the website. These cookies do not store any personal information.


Thats the complete tutorial, Thanks for commenting. More tutorial on the way. Just revisit.