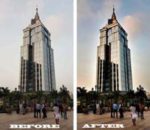
Making a Time-Lapse Video involves time-lapse photography to record a scene or objects that change slowly. Which is then played at high speed to make a video
The Time-Lapse video basically consists of a sequence of multiple Photography. Shooting a bunch of photos of the same scene which is changing slowly, spread out over a period of time.
To create a Timelapse video, you need to take a bunch of still photos of a subject or a scene over a period of time.
How many photos to take, will depend on the length of the Timelapse video you intend to create. The time interval between shots needs to be calculated.
check our detailed article on How to Make a time-lapse video-A step by step guide. We have discussed in detail how to calculate the number of still shots to be taken for a particular event.
Also how to calculate the time interval between each shot. As this will determine the final quality of your time-lapse movie.
In the above article, I discussed how to make a time-lapse video using QuickTime Pro software.
Today I will be sharing with you how to make Time-lapse video with Windows Moviemaker. Assuming that your timelapse photos are saved in a folder.
Make Time-Lapse Video With Windows Movie Maker
Windows movie maker comes bundled with your Windows XP, Windows 7, Windows 8.1, Windows 10.
If you don’t have Windows Moviemaker installed on your system. You can download Windows Essentials and install it.
Windows essentials is a software bundle that includes, Windows Live Mail and Movie Maker, as well as Photo Gallery, Messenger, Writer, and OneDrive.
Windows Movie maker is a most underrated tool, that many users ignore. It’s free and you can do the most common editing of your videos. Like video splitting, trimming, adding music to video, add titles, captions, and many more features. Windows movie maker also allows you to save your edited video in many different formats.
Ok! so much about Windows movie maker, let’s get down to business.
If you prefer, we have a short video here….
Don’t Like the Video? Than Read on
I assume that you have already taken your sequential shots for the Time-Lapse video and saved them on a separate folder.
Step 1: Launch Windows Moviemaker from the all programs menu.
Step 2: In the ribbon menu click on “Add videos and Photos”

Step 3: This will open an explorer window. On the left scroll and select the folder containing the images to open.
Step 4: Now press Control+A on your keyboard to select all the images. At the bottom click “Open”
Step 5: Windows movie maker will load all the images, like a film strip on the right half, with the first image displayed in the preview window.
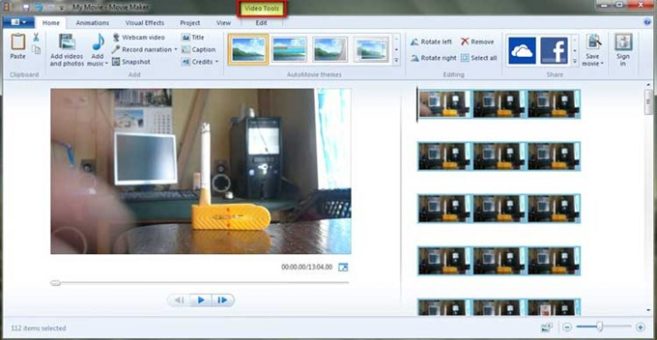
Step 6: Now on the top of the menu click on the “Video tools” which you will see with a yellow background.
Step 7: In the video tools window you will see the option “Duration” where you can set the time duration for your video.
By default 7.00 minutes is set. You have the choice to select from 1.00 minute to 30.00 minutes. But you can also manually set it, from a few seconds to a few minutes.

Step 8: We are almost finished. In the right half, click on the first image then press CTRL+A to select all the images.
In the duration field option set the time in seconds or in minutes as per your choice. For example in the above Time-lapse video of Cigarette burning down I set it to 0.10 seconds since it had only 112 shots.
For Timelapse video, a shorter duration video works best to get the effect.
Now click on the play button. Windows movie maker will render your images into a Time-Lapse video.
As per your taste you can either increase or decrease the time duration. Decreasing the time will have a faster effect.
Once you are satisfied with the video, click on the file (folder icon with an arrow) > Save movie. You will find a lot of choices, you can save in HD format or even for your smartphones or have your own custom format.

Hello! I am Ben Jamir, Founder, and Author of this blog Tipsnfreeware. I blog about computer tips & tricks, share tested free Software’s, Networking, WordPress tips, SEO tips. If you like my post /Tips then please like and share it with your friends.
